
My rainbow flip calendar is one of my favorite classroom décor pieces. In this post, I’ll show you how to create this functional and purposeful calendar must-have!
STEP 1: Choosing Your Rainbow Flip Calendar
My Rainbow Flip Calendar resource includes your choice of three different rainbow styles. (If you prefer a Black and White Flip Calendar, you can find that as well in my TPT Store. You can print this set onto any paper color of your choice.)

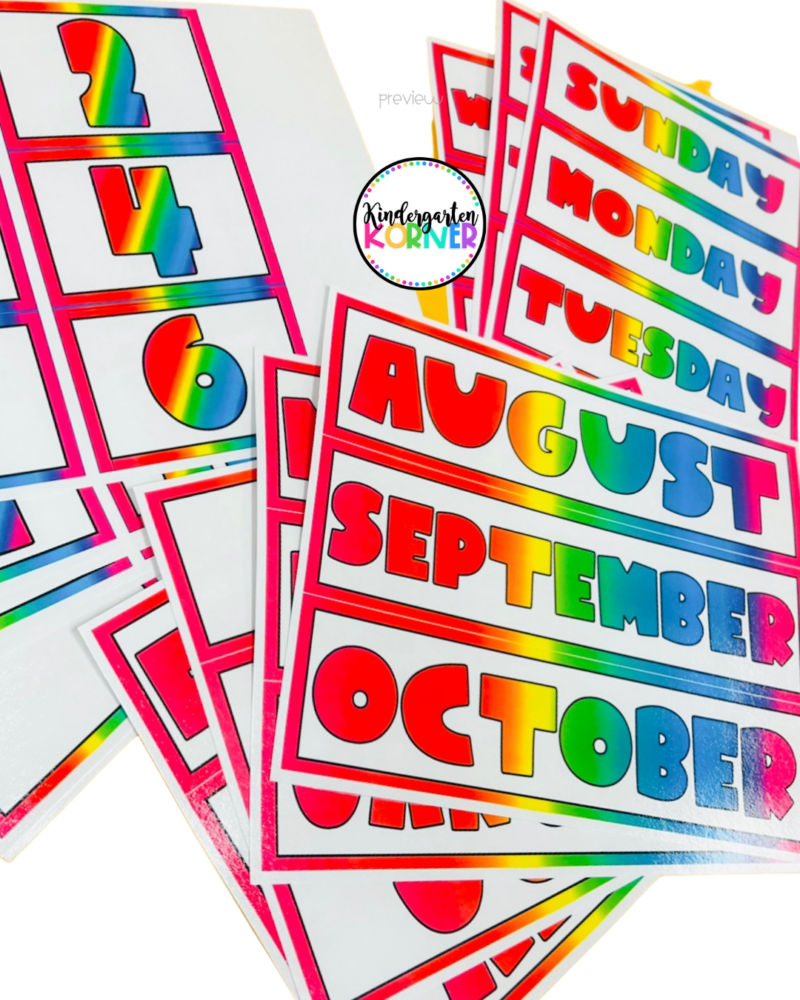
Option 1 includes rainbow bubble letters on a white rectangle with a rainbow border. This is the version seen in the first photo in my own classroom.

Option 2 features a rainbow background with white bubble lettering outlined in black.

The third option has black lettering on a white rectangle framed by a rainbow border.
All three options include Months of the Year Cards, Days of the Week Cards, Numbers 1-31, Years 2022-2030, A “Today is:” card, and hyphens for digital date. In addition to using this resource to create a flip calendar, you could also use it for a traditional calendar or create a bulletin board for months and days of the week!
STEP 2: Print, laminate, and cut!
Once you’ve selected the style you like best, simply print, laminate, and cut!
STEP 3: Attach rings and display!
Once you have everything cut, place your months, date cards, and year in stacks. Hole punch on each side and place the cards onto binder rings. Display on a magnetic curtain rod. I purchased mine on Amazon. I like that it is adjustable and the magnets are sturdy.
Are you ready to create your own rainbow flip calendar or a black and white flip calendar? Head to my TPT Store to get started!
For more classroom inspiration, visit THE KINDERGARTEN KORNER BLOG!